With features such as the ability to install/uninstall apps, get access to Windows Registry, automate tasks, or even perform remote operations, there’s a lot of things that a PowerShell could execute. However, most of these tweaks call for the need to have administrative-level privileges.
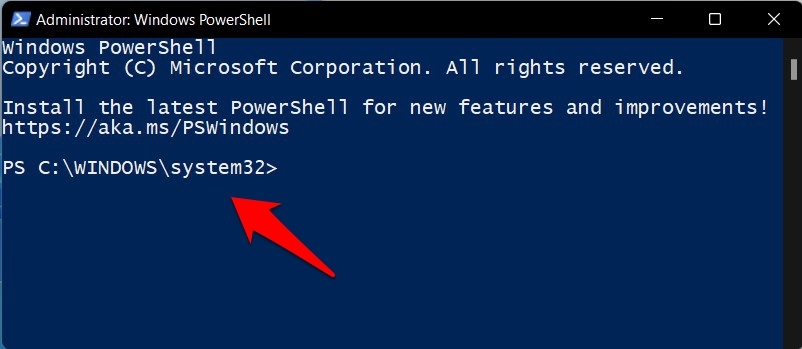
But when you open a PowerShell window, its default state will be in a non-elevated (non-admin) mode. So one way out is to head over to the Start menu and then manually launch the PowerShell window as an administrator every time when needed. This may be sufficient for one or two usages, but it might feel like a cumbersome process on a regular basis. If you also echo this thought, then you’ll be glad to know that there is an efficient way to deal with this issue. You could instruct your PC to always open PowerShell as an Administrator by default in Windows 11. And in this guide, we will show you how to do just that. So without any further ado, let’s get started.
Methods to Run PowerShell as an Admin by Default in Windows 11
There exist two different methods to carry out the aforementioned task. Both these approaches do require a little bit of extra effort, but it is only for the first-time setup. You just need to double-click on the PowerShell shortcut from simultaneous usage onwards, and it will automatically open with administrative privileges. So on that note, let’s check out both these approaches.
Method 1: Using a Batch File
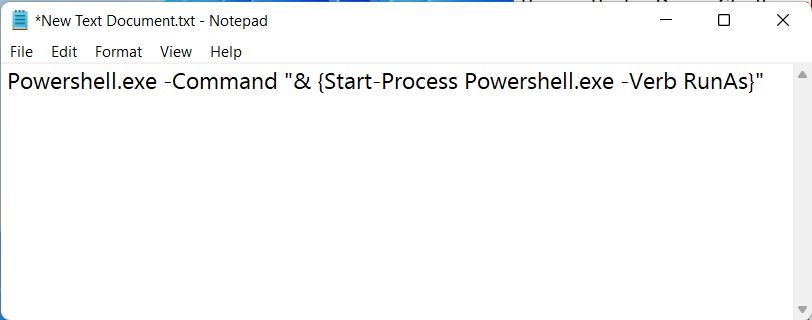
In this method, we will be creating a batch file via Notepad with a specific line of command. The command, when executed, will straightaway launch PowerShell as an admin. Follow along for the instructions: So this was the first method through which you could open PowerShell as an Administrator by default in Windows 11. One thing to note here is that you could assign any name to the batch file, but make sure to keep the extension .bat only.
Method 2: Via Desktop Shortcut
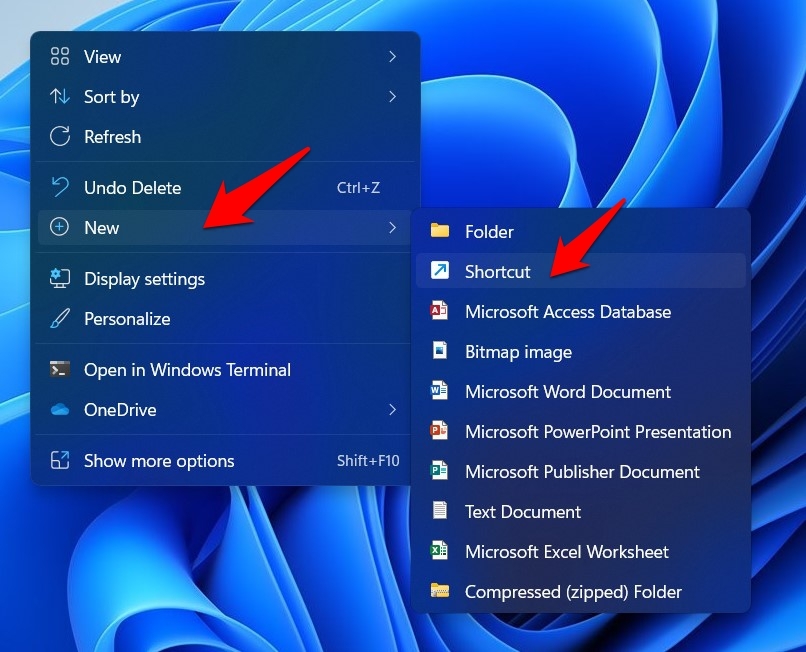
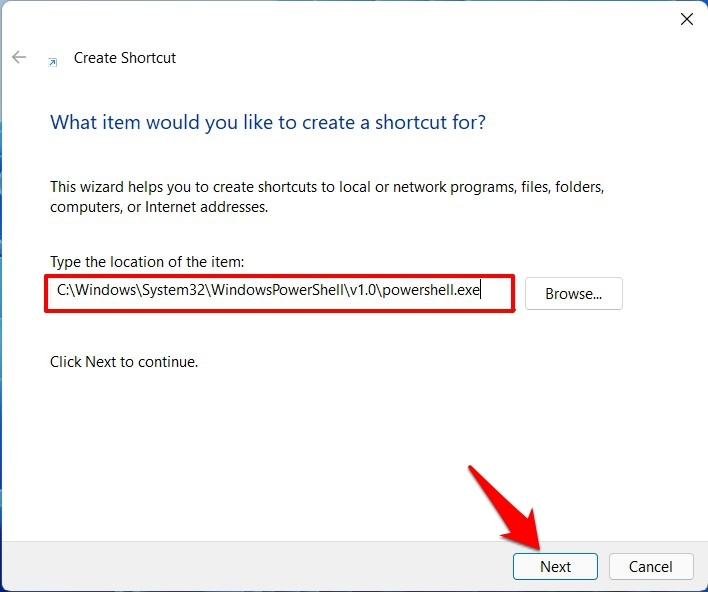
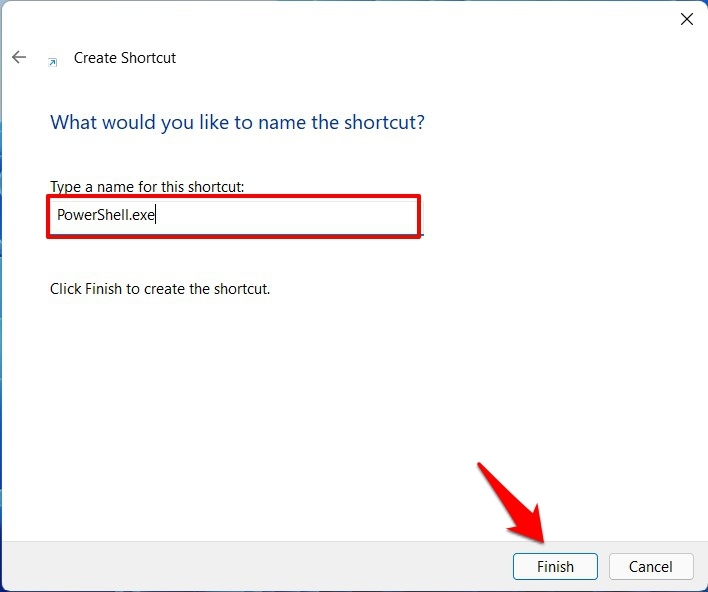
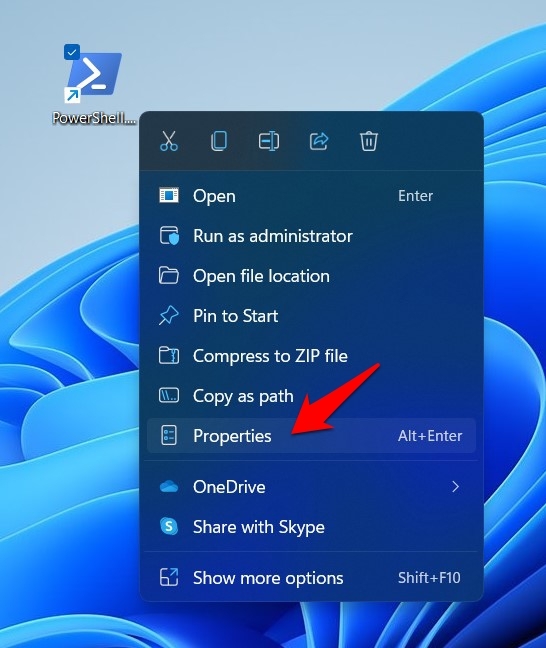
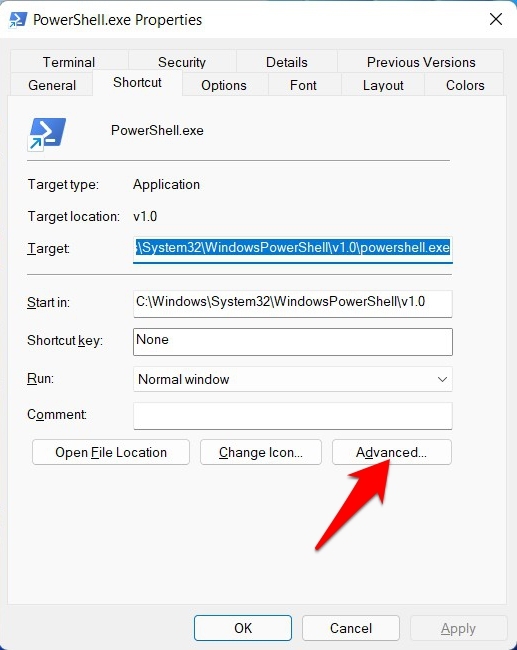
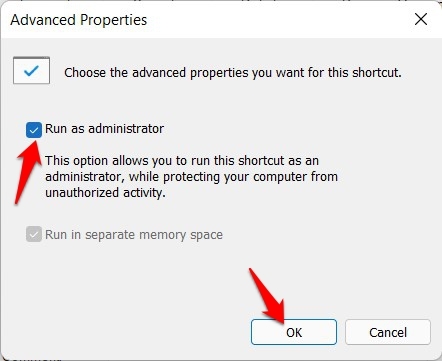
We will create a desktop shortcut that will directly point to PowerShell’s EXE file in this method. After that, we will give it permission to always open this shortcut with administrative privileges. Combine both of these steps, and your tasks stand complete. One thing to note is that while you could give the shortcut any name of your choice, but the extension should be kept .exe only.
Conclusion
So with this, we round off the guide on how you could open PowerShell as an Administrator by default in Windows 11. We have shared two different methods for the same. Do let us know in the comments section if you have any queries concerning the aforementioned instructions. If you’ve any thoughts on How to Open PowerShell as Admin Default in Windows 11?, then feel free to drop in below comment box. Also, please subscribe to our DigitBin YouTube channel for videos tutorials. Cheers!