OBS Studio System Requirements
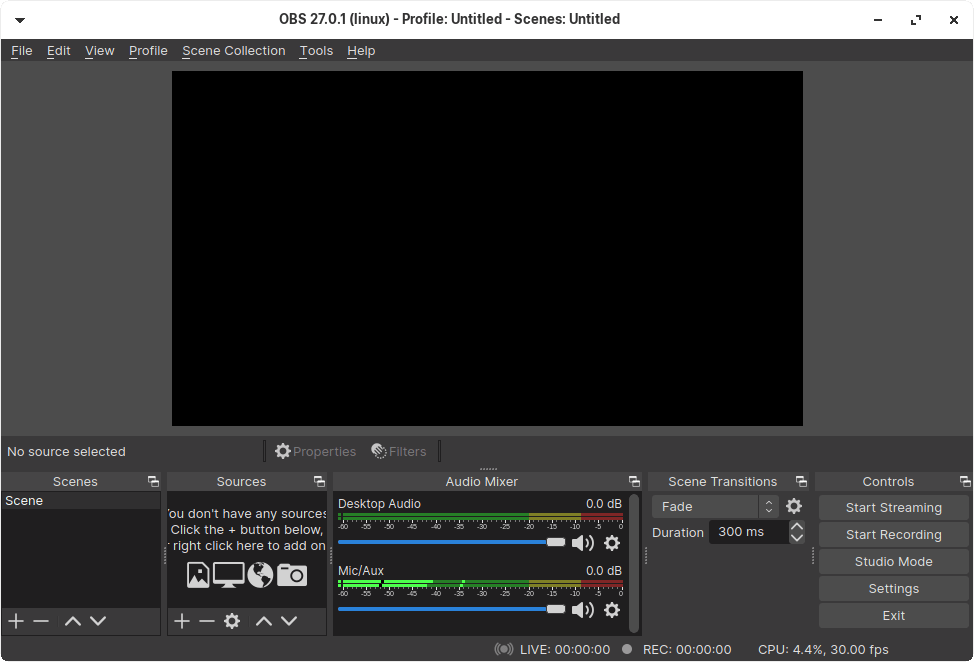
Project OBS is an open-source program, and it is developed & maintained by the community. The program is lightweight and doesn’t consume a lot of hardware resources in an idle state. Screen recording and streaming is a resourceful task, and low-end machines will struggle to pull off 720p recording. Allow me to suggest a realistic system requirement for 720p and 1080p recording.
720p Capture
CPU: Minimum Dual-Core 2.0GHz processor RAM: 4 GB (free 1.5 GB) Storage: 10 GB free (HDD/SSD) GPU: Integrated or Dedicated with 512MB video memory Audio: Standard or HD Audio Chipset The game recording is a challenge on older machines, so do not raise your hope unnecessarily. I have struggling to record games on a 2016 low-end machine, and it is good enough for screen capturing.
1080p Capture
CPU: Minimum Quad-Core 2.0GHz processor RAM: 4 GB (free 1.5 GB) Storage: 10 GB free (HDD/SSD) GPU: Integrated or Dedicated with 512MB video memory Audio: Standard or HD Audio Chipset Your GPU/CPU will utilize a minimum of 50% of the hardware resources to record the screen. Consider the RAM usage and program selection in mind if you are trying to capture a Photoshop or any other heavy program tutorial, and then the machine requires 8 GB RAM.
1080p Game Recording & Streaming
You will find one million tutorials covering “Game Streaming” and I haven’t read one realistic guide out there. Let me inform you that there is a difference between “gaming on PC” and “gaming and streaming from one PC”. You can find hundreds of budget gaming PC build tutorials online. Modern games push the GPU and CPU to 93% – 99% on the lowest setting. Your CPU/GPU will end up throttling with a bad gaming experience and sluggish recorded clip. There will be a significant FPS drop and an unpleasant video output. Here are the realistic system requirements for gaming & streaming from the same PC.
For Windows 10 or later
CPU: Minimum Core i5 or Ryzen 5, 6-Core & 6-Threads CPU GPU: GTX 1060 (6 GB) or RX 570 (4 GB) or RTX 2060 (GTA 5, Valorant, Apex Legends, PUBG PC, and more) RAM: Minimum 16 GB (8 GB RAM is not enough anymore) Storage: Standard SSD (HDD is no longer recommended) Audio: HD Audio Chipset Windows 11 is a hardware-hungry software, and a 4-Core CPU & 8GB RAM are ideal for gaming only. Even Windows 10 is a heavy package, and I was struggling to game and record from the same PC. A 6-Core CPU and 16 GB RAM bring immense hardware power to the table, and that’s what you need in this case.
Configuring OBS Studio on Mac/Windows/Linux
All right, OBS has a dedicated feature that identifies the hardware capability and suggests a butter-smooth recording preset. Finish 50% of the task with the Auto-Configuration Wizard tool. Step 1: Click on “Tools.” Step 2: Click on the “Auto-Configuration Wizard” option.
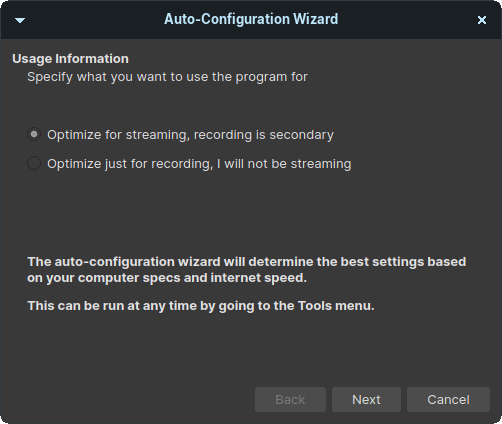
Step 3: Choose one and then click on the “Next” option. I have selected the second one since I don’t plan to stream on this low-end machine.
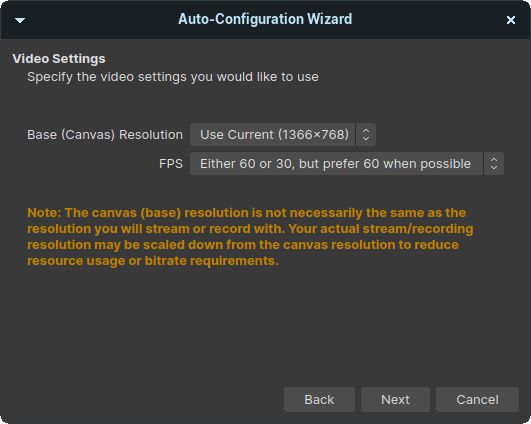
Step 4: OBS will detect the monitor resolution and apply the setting. Do not mess around with the default setting and click on “Next” to make life easier.
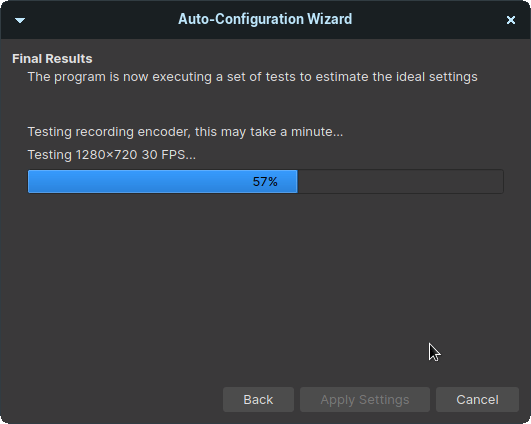
Step 5: Let the OBS encoder run a few CPU/GPU tests.
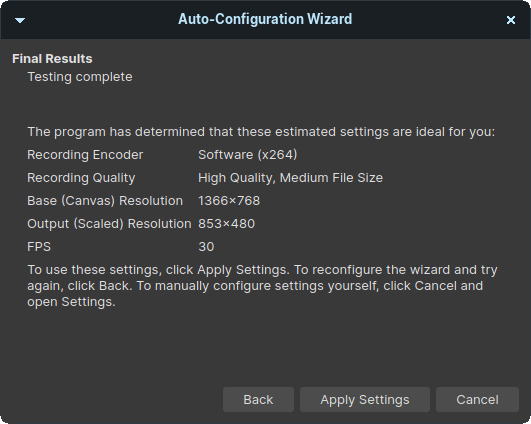
Step 6: OBS suggested 853×480 resolution and 30 FPS.
My low-end laptop is a 2016 make, and it isn’t a packhouse. Nonetheless, OBS suggested an ideal 720p screen recording setting. The instruction will be the same on Windows, Mac, and Linux, despite demonstrating screen recording tutorial on Linux (Zorin OS 15.3) software.
Add Elements
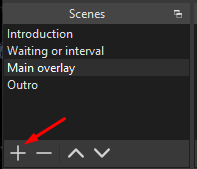
Let me show you a few elements that you should add to start recording the desktop. Step 1: Click on the “+” button under “Scenes.”
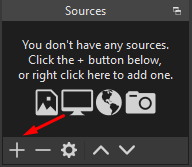
Step 2: Click on the “+” button under “Sources.”
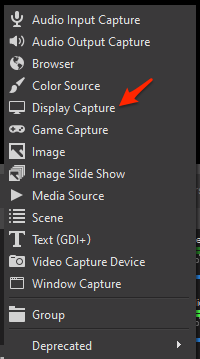
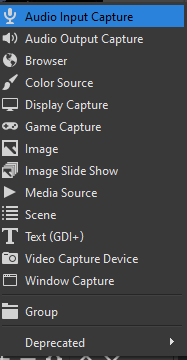
Step 3: Choose “Display Capture” from the menu.
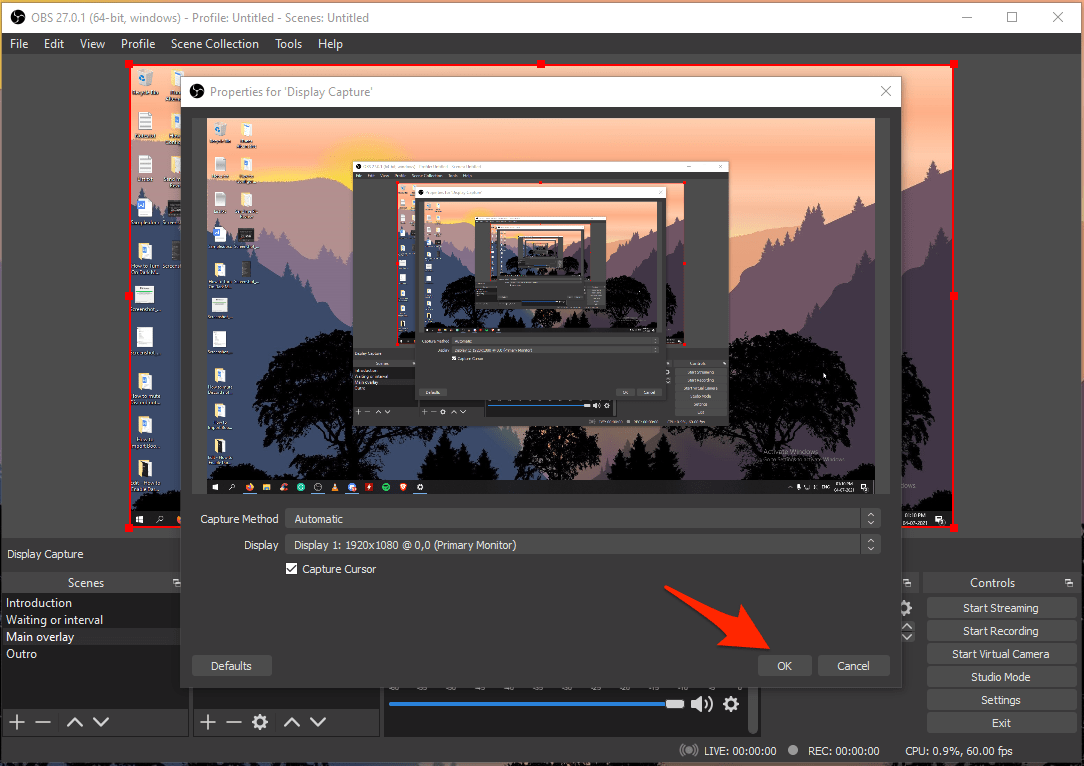
Step 4: You have an option to hide the cursor or leave it that way and then click on “OK” to continue.
Step 5: You have microphone settings in the “Audio Mixer”, and you can control it from there.
Step 6: In case if the microphone is not listed in the “Audio Mixer”, then click on the “+” button under “Sources” and then select “Audio Input Capture.”
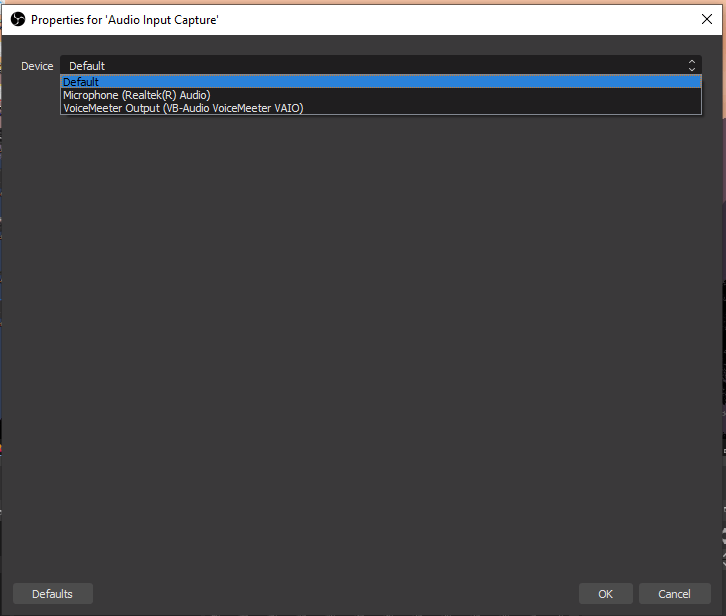
Step 7: Click on the drop-down menu and then choose the microphone.
You have successfully added elements to start recording the desktop screen.
How to Record Desktop Screen in 720p Resolution?
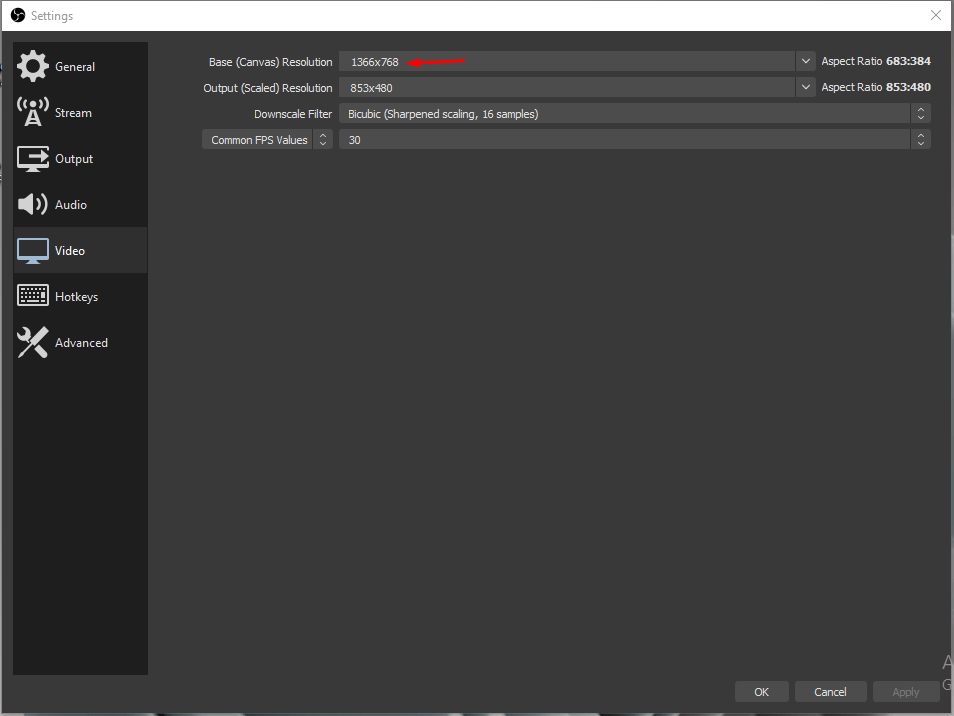
You will find millions of Windows and Linux machines that have 1366 x 768 or 720p primary monitors. OBS Studio supports 720p resolution recording, and I have captured several tutorials in low resolution. The Auto-Configuration Wizard does 70% of the job including the settings, but if you want to force the machine to record in 720p, you can do so. Allow me to show you how you can quickly record the screen in 720p with a minimal performance impact. Step 1: Click on “Settings” located in the bottom-left side panel. Step 2: Choose “Video” from the settings. Step 3: Make sure the “Base (Canvas) Resolution” is your monitor or display resolution. Base (Canvas) Resolution: 1366 x 768 (that’s the actual screen resolution of my netbook display) Step 4: Now, change the “Output (Scaled) Resolution” is 720p resolution.
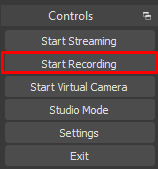
Output (Canvas) Resolution: 1366 x 768 or 1280 x 720 Step 5: Click on “Start Recording” to begin capturing the screen.
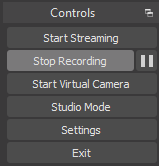
Step 6: Click on “Stop Recording” to end the screen recording.
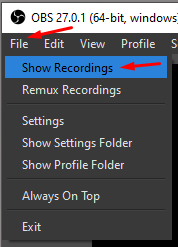
Step 7: Click on “File” located at the top menu and then choose “Show Recordings” to access the captured video.
You can access the captured video in the folder.
How to Record Desktop Screen in 1080p resolution?
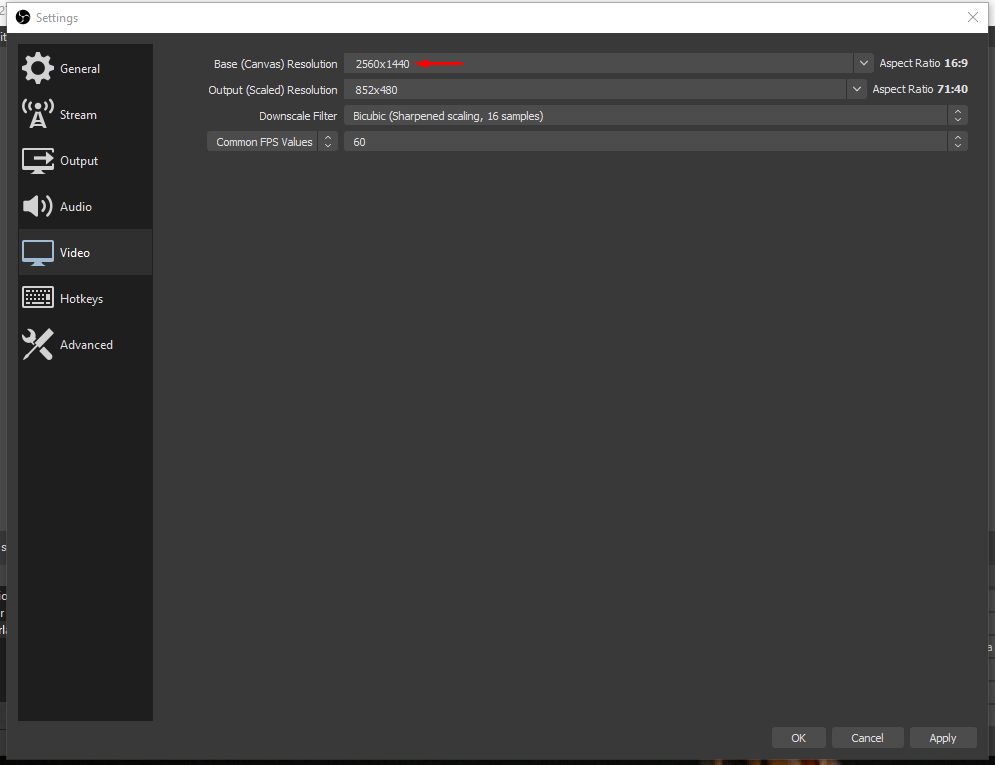
If your monitor base resolution is 2K or lower than 1080p, you don’t have to record in default resolution and capture the desktop in 1080p resolution. Step 1: Click on “Settings”. Step 2: Choose “Video” from the settings. Step 3: Leave the “Base (Canvas) Resolution” to default. Base (Canvas) Resolution: 2560 x 1440 (that’s my external monitor resolution) Step 4: Now, change the “Output (Scaled) Resolution” is 1080p resolution.
Output (Canvas) Resolution: 1920 x 1080 Step 5: Click on “Start Recording” to begin capturing the screen.
Step 6: Click on “Stop Recording” to end the screen recording.
Step 7: Click on “File” located at the top menu, then choose “Show Recordings” to access the captured video.
Your 1080p video is ready to be uploaded. Many content creators push the resolution higher despite having HD+ resolution monitors.
How to stream online from OBS Studio?
Streaming is a completely different ball game and requires knowledge to set elements, resolution, bit rate, and more. I have authored a dedicated guide on how to stream online using OBS Studio, and that’s all you need to start from today itself.
Conclusion
You needed guidance in configuring OBS Studio in Windows and other platforms. I have shown you essentials parts that you needed to know about the open-source screen capturing program. Practice what I have shown you in the tutorial for thirty minutes, and you will master the controls within no time. I have taught you how to record, stream and save desktop screens in local storage. Let the world know what challenges you faced while configuring OBS Studio in the comment section below. If you’ve any thoughts on How to Configure OBS Studio? [Complete Guide], then feel free to drop in below comment box. Also, please subscribe to our DigitBin YouTube channel for videos tutorials. Cheers!
